
Heeey folks. I am not sure if there is already a guide or article about this soooo I decided to post one for those who experience the infamous auto-eject bug that happens to almost(?) all ps4’s out there. Specially the older units. Feel free to approach me if there’s a post about this one and I will delete this immediately.
- Related: PS4 Blu-Ray Drive stopped working for no reason? Here’s how to fix (on MakeSmartTV.net)
First of all, I hate the fact that the ps4 uses a touch sensitive eject button. This is the main cause of all this shenanigan happening to our beloved ps4. The most irritating part is when it happens in the middle of a game and God forbid, during a Boss fight. So here are the stuff I learned from my fellow gamers here in the PH and the internet of course. Enjoy!
1. Change the position! Some of you might not know this issue because of the fact that your PS4 is positioned vertically (Some people say that this permanently fixes the problem). I heard that the PS4 is designed to be used this way but I prefer the other way around coz i love the diagonal design of the ps4 .
2. If you prefer to have your ps4 horizontally chilling beside your TV, then you might wanna try to raise your PS4 up off the ground by placing a couple of CD cases underneath
3. Wipe the dust from the eject button.
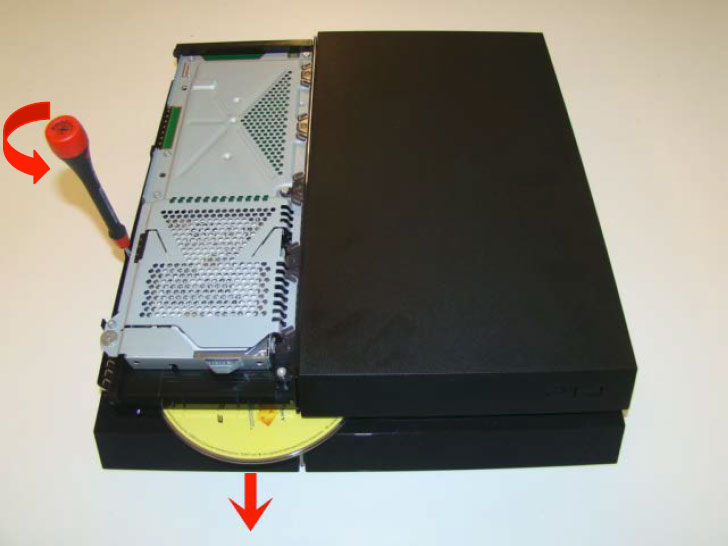
4. Remove the hdd panel, the glossy part by sliding panel and tighten the manual eject screw. See pic below
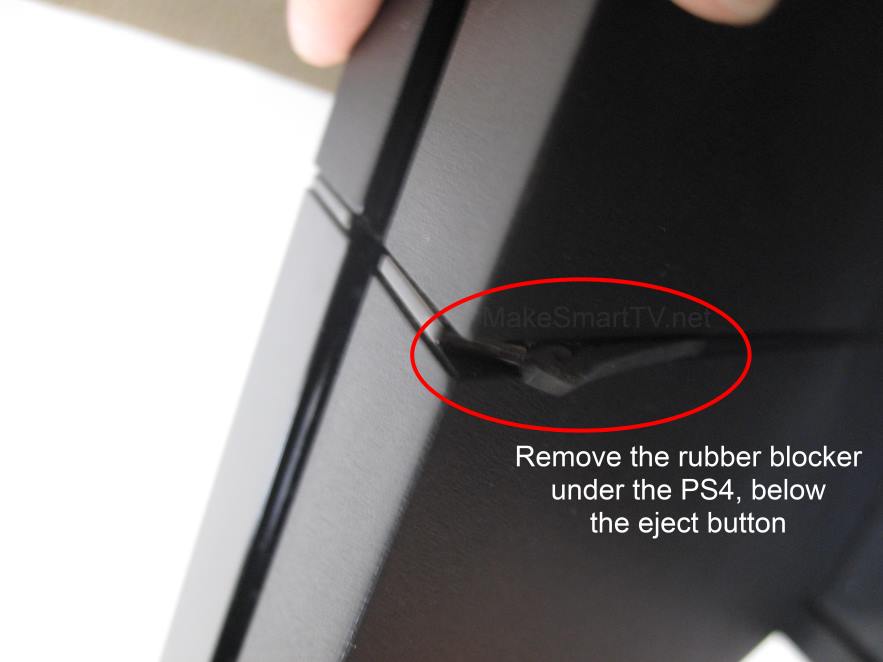
5. Remove the rubber foot located at the center of the console. The one touching the eject button. This rubber expands when the ps4 is used for long periods of time specially if you are playing/grinding on BloodBorne 
6. If for some reason your PS4 doesn’t accept your game after an auto-eject happens. Do the following:
* Hug your mom and tell her how much you love her 
*Power down the PS4, unplug the cord and press the eject button while unplugged. You will hear a few beeps
then turn it on and voila! You just made your mom happy and fixed your console
7. Boot into safe mode, and re-initialize the PS4. Switch of PS4 using power button on main control panel, once the PS4 is off, press and hold the power button. Release it after you’ve heard two beeps: one when you initially press, and another 7 seconds later. See pic below.

Last option is to use option 7 in safe mode and re-install firmware or return the unit to Sony for warranty claim.
update:
Hey guys its been a while.. i have been playig the witcher 3 slowly and enjoying every bit of its vast open world. i just want to share a few of my silly experiments with regards to this auto-eject syndrome.
8. put the ps4 upside down.
this may sound silly but it works. i was able to kill nekkers and other beasts for a month without auto eject.
after a month, the problem re-occurred so i decided to do something else.
9. Put tapes on the sensor.
i am doing this for 2 days now and so far no auto ejects.
i will be updating this thread when i have the chance..
note: you can combine these tips and share your experience..
happy gaming
PS4 Disc Issue: the ultimate fix
Heeey… Assuming that some people have been reading my tutorial here, I will be posting my final update on this one.
After trying all the temporary fixes found all over the internet, finally I was able to permanently fix the auto eject issues on my beloved ps4.
Requirements:
- PS4 (unless you have a Wii U or an xbone)
- TR9 Torx Screw
- Electrical Tape
Step 1 :
Open the ps4 by removing the warranty stickers (ooops.. no more warranty for you) and unscrewing the 4 screws at the back of the ps4.

Step 2:
Lift the bottom cover of the ps4 and locate the small sheet of gold metal and put a small electrical tape on it.

Step 3:
Close the ps4 and put all the screws again
Step 4:
PROFIT!! Your warranty is voided and you have disabled the eject button of your Ps4. Now you have to use the controller every time you have to eject your discs.
Again, Happy gaming!!!
Note: i got the pics from my fb page where i shared the tutorial to my fellow Filipinos.
No comments :
Post a Comment